Step 1: Access your Content Stadium account
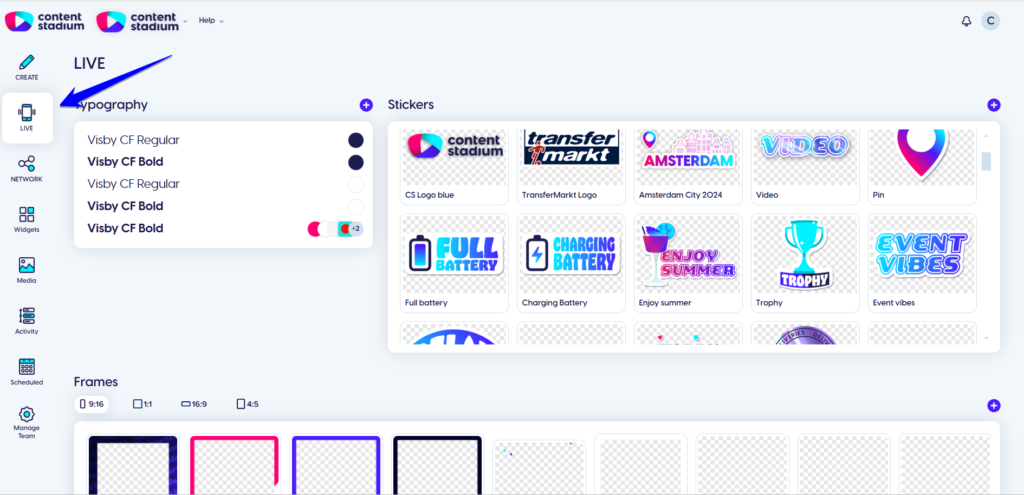
First, log in to your Content Stadium account and then select the LIVE tab from the menu on the left side of your screen.
Step 2: Upload your branded assets
Why upload fonts, frames, and stickers to LIVE?
- Uploading your custom fonts, frames, and stickers allows you to brand your stories and posts in a few clicks, making it an opportunity to boost brand awareness on social media.
- With full control over your branded assets, you can ensure that every story, reel, and post aligns with your brand identity, no matter who’s creating the content.
- Additionally, custom-designed frames and stickers enable you to organize your social media stories by brand, campaign, or event and even dedicate content to sponsors. Learn more about the benefits of using Content Stadium LIVE.
Now let’s walk you through how to upload your branded fonts, stickers, and frames:
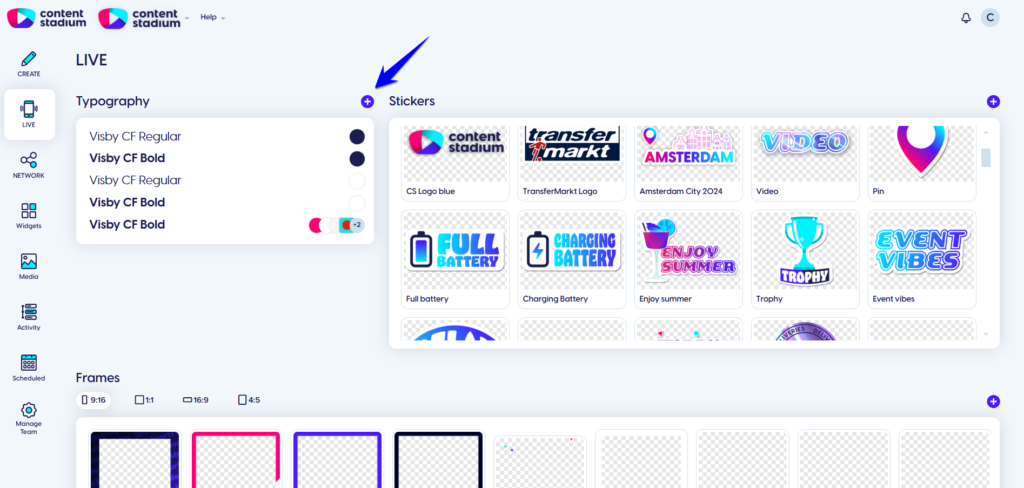
First, go to the LIVE tab and click the + icon.
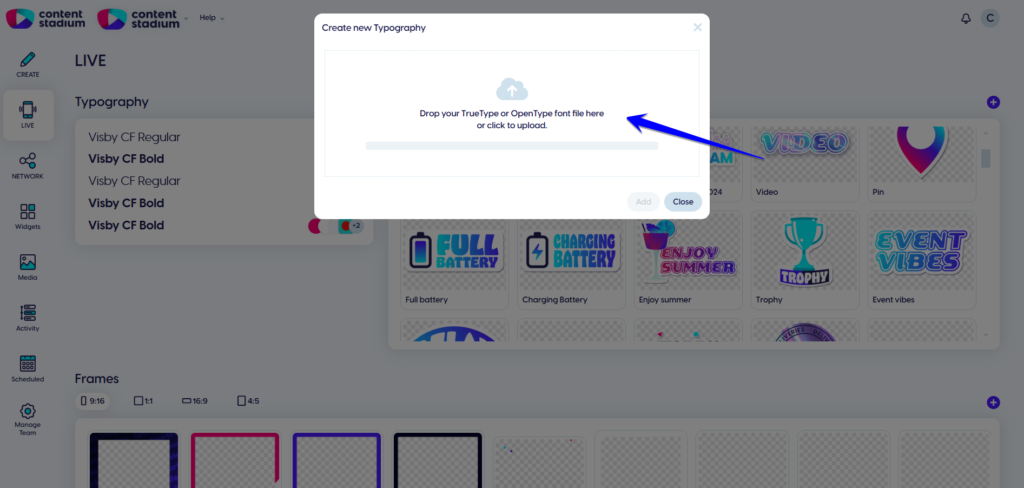
To get started and start importing branded fonts, click the + icon and either upload or drag and drop your fonts directly from an open folder.
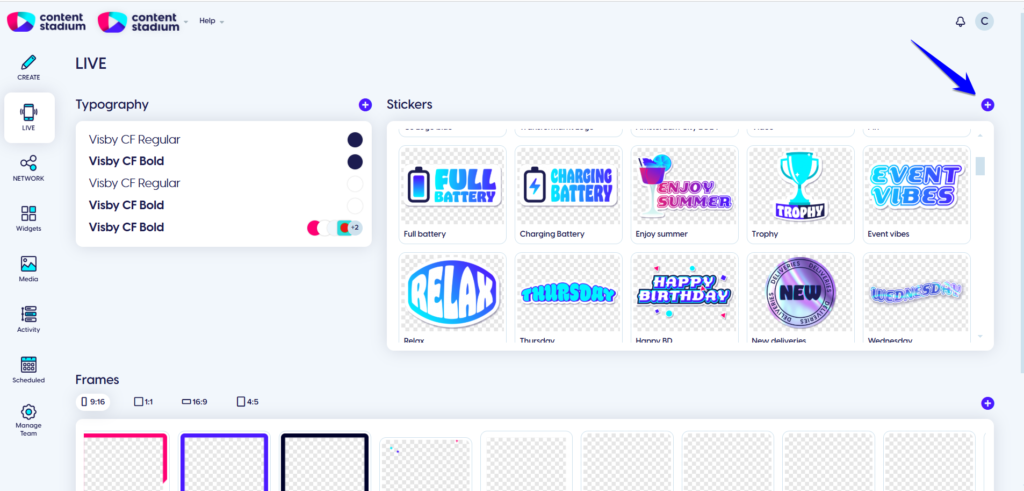
Repeat the same steps to insert stickers, by simply clicking the + icon on the right side of your screen.
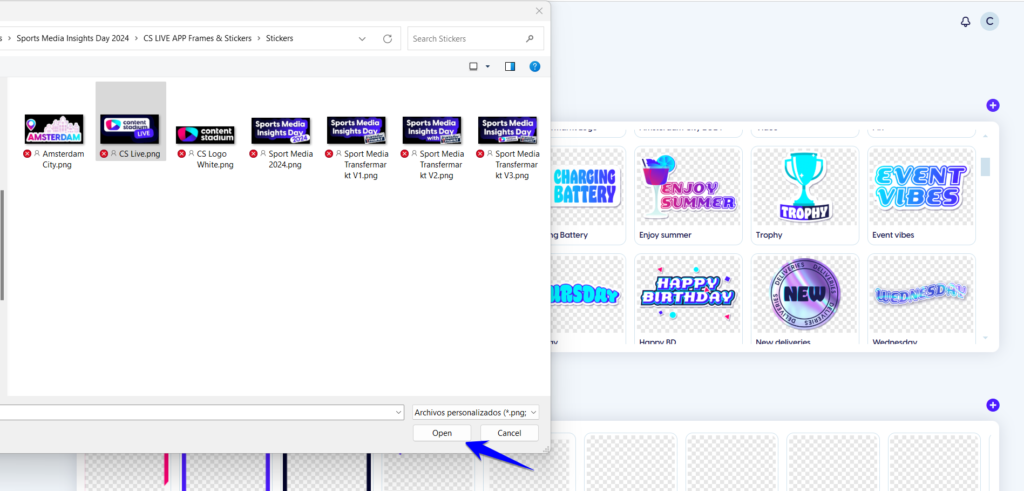
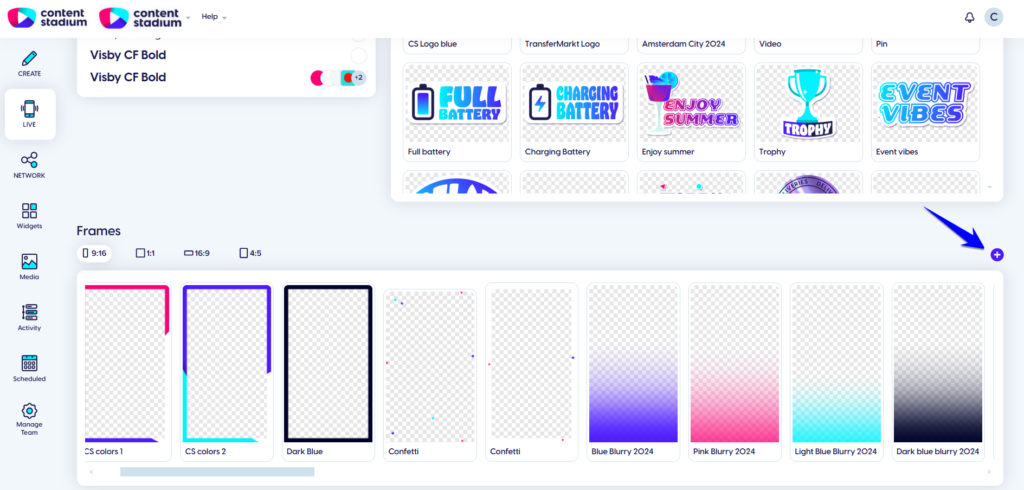
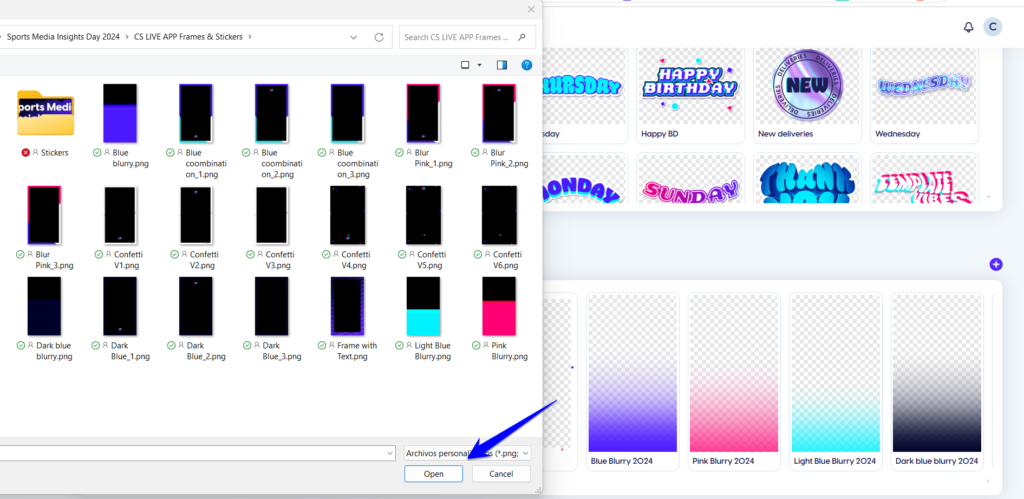
And then, in order to add branded frames, click the + icon at the bottom of your screen.
Curious about how to create your own branded frames? Download this step-by-step guide, where we walk you through everything you need to know!
Step 3: Download the LIVE app
Search for Content Stadium LIVE on Google Play or the App Store and download the app directly to your device.

Step 4: Start using your LIVE app
Once you’ve downloaded the app and uploaded all your branded assets, you’re ready to start creating content.
- To get started, tap the pen icon in the bottom-right corner of the app to begin. Open your camera to capture real-time content or upload a photo or video from your gallery.
- Then, choose the layout of your story and decide whether to use one of your branded frames. Depending on your selected layout, you can combine multiple photos and/or videos into a single story.
- You can also add your branded stickers (which you previously uploaded in the studio).
- Finally, you can personalize your content further by adding text in your branded fonts.
Step 5: Post directly to your social media feeds, reels and stories
Once you’re satisfied with your final image or video, you can either download it to your phone or publish it directly to your social media stories, reels, or feeds, all from within the app.
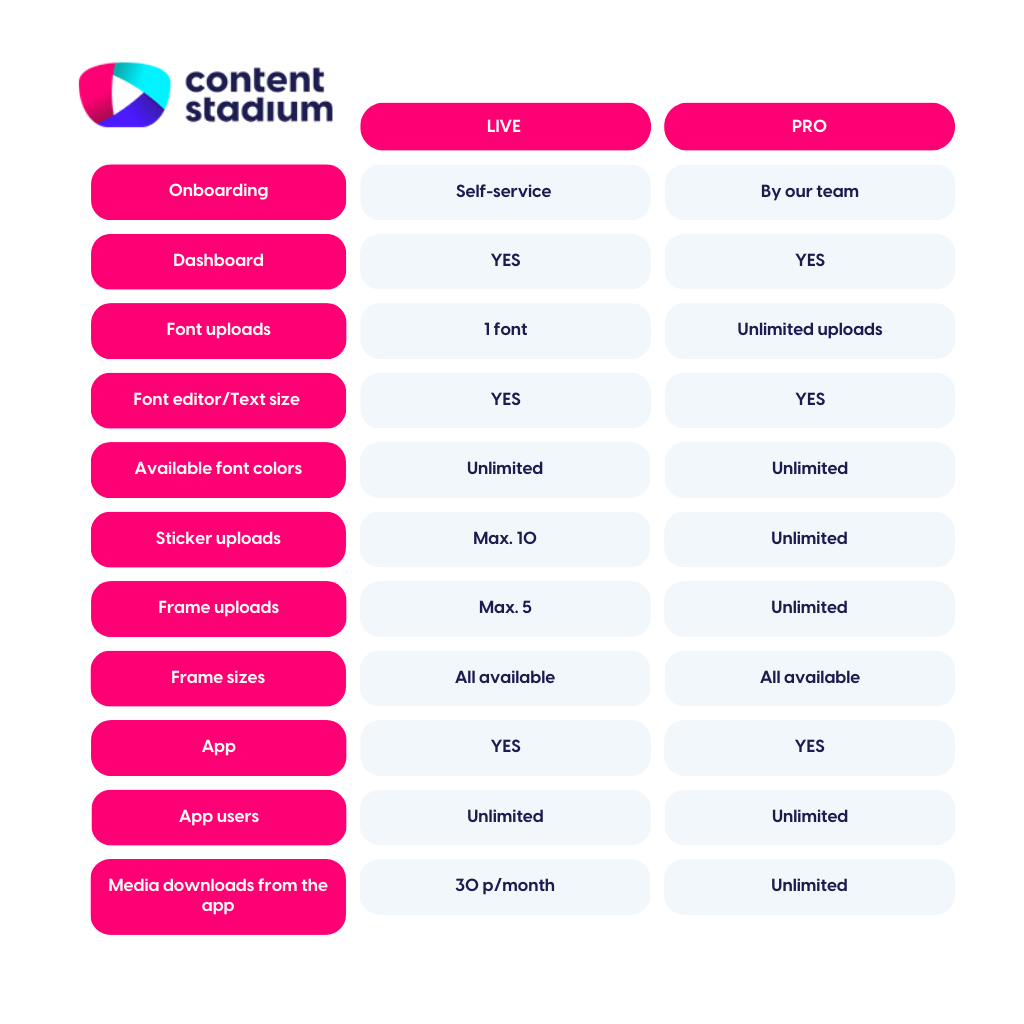
LIVE BASIC vs LIVE PRO
Compare all the differences between LIVE BASIC and LIVE PRO in the table below:
Got more questions?
Reach out to your dedicated Customer Success Manager for more assistance.


