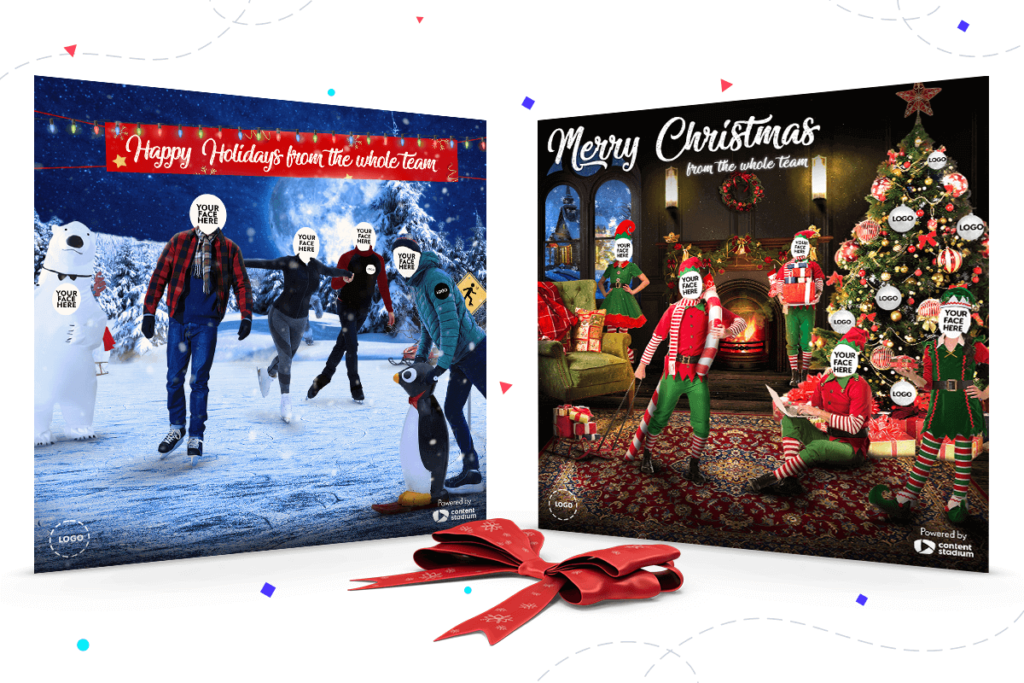
As a thank you for being with us, we have an end-of-year gift for you. You’ll find two free Holiday and Christmas templates in your Content Stadium account for you to personalize with photos of your colleagues, friends, family and partners, and bring a smile to their faces this festive season!
In this article, you can get an overview of where to find and how to use the templates, including video tutorials.
Where can I find these templates?
You can find both templates in your Content Stadium studio account, in the CREATE tab. Scroll to the bottom of the page to find the templates under a new section named: A gift from Content Stadium: Personalized holiday e-cards.
What can I use them for?
We designed these templates as fun holiday e-cards for you to send to colleagues, friends and partners. You can download the templates as an image or as a GIF, both of which you can embed in an email (more on this below).
But you can of course use the templates for any other purpose — business or personal. For example, for a personal or company social media post, a printout on your boss’ desk, a “team photo” on an end-of-year website article, a quick holiday wishes WhatsApp message, or even as your annual family Christmas card with a twist. See what you can come up with!
How can I edit the templates?
There are 2 templates for you to choose from: a Happy Holidays template and a Merry Christmas template.
As a user of Content Stadium, you’ll likely get the hang of these templates pretty easily. But below you can find video tutorials and checklists of all the edits that are possible, to be sure you don’t miss anything.
Happy Holidays template:
- Personalize your characters: Add a photo of you, your colleagues, your friends, or even your pet to bring each character to life! Double click on each FACE HERE placeholder to open the media library. Then upload your image and cut out the background with our cutout tool for the best effect. Once in the template, scale, flip and move the photo to adjust it into the right spot.
- Scale and move your characters: Click on any character to move it, and scale it up or down using the red dots on each corner.
- Remove a character: Click on the character you want to remove and slide the Display toggle to remove it. You’ll find it again under the Hidden Layers on the main menu.
- Add or remove your (brand) logo: If you’d like to represent your brand, you can add your logo to the template. Double click on the logo placeholder at the bottom left of the template to open the media library and upload or select an image. The logo will then also automatically appear on the jackets of 2 of the skaters. Not looking to brand your template? No problem. Use the Logo toggle on the main menu to remove all logos.
- Change the (brand) color: Using the Theme Colors menu, you can change the color of the text banner and the snowman’s scarf. You can input your brand color code, use the color picker to choose a color from the template, or manually select a color.
- Edit the text: Add your own holiday message by double clicking on the banner. The text size will get smaller as you add more text.
- Play the animation and see the snow falling!
Merry Christmas template:
- Personalize your characters: Add a photo of you, your colleagues, your friends, or even your pet to bring each character to life! Double click on each FACE placeholder to open the media library. Then upload your image and cut out the background with our cutout tool for the best effect. Once in the template, scale, flip and move the photo to adjust it into the right spot. Some of these characters can be tricky to match with the right face compared the other template (a learning for next year!) — try to find photos that have the correct angle for the best effect.
- Scale and move your characters: Click on any character to move it, and scale it up or down using the red dots on each corner.
- Remove a character: Click on the character you want to remove and slide the Display toggle to remove it. You’ll find it again under the Hidden Layers on the main menu.
- Add or remove your (brand) logo: If you’d like to represent your brand, you can add your logo to the template. Double click on the logo placeholder at the bottom left of the template to open the media library and upload or select an image. The logo will then also automatically appear on some of the Christmas tree ornaments. Not looking to brand your template? No problem. Use the Logo toggle on the main menu to remove all logos.
- Change the (brand) color: Using the Theme Colors menu, you can change the color of the blanket on the sofa and some of the tree ornaments. You can input your brand color code, use the color picker to choose a color from the template, or manually select a color.
- Edit the text: In this template, you have two lines of text to use (or remove) as you see fit. Double click on the text to add your own message. The text boxes will respond automatically as you type.
- Play the animation to see the curtains opening and fire burning in the chimney.
How can I download and embed these templates?
You can download your final template designs in 2 formats: as a GIF, or as an image.
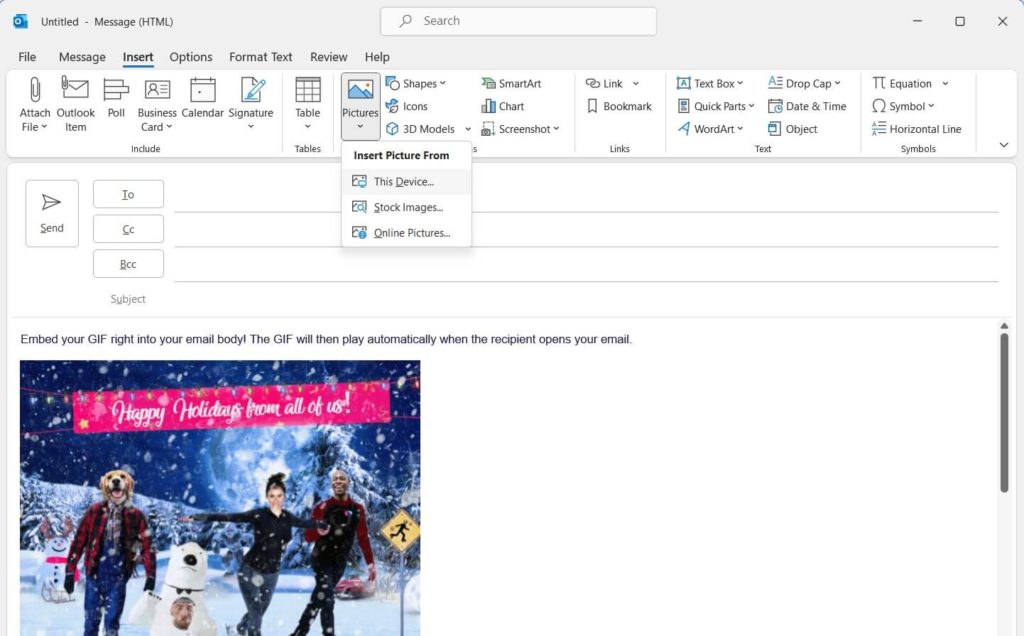
Both formats can be embedded into the body of an email. The GIF will then play automatically (unlike a video which normally needs to be added as an attachment). An image embed will provide you with the highest quality (and recognizability for your characters), while the GIF download will allow you to add dynamism to your holiday message.
How do I embed a GIF into an email? First, download and save the GIF to your computer. Then, open your email, choose Picture or Insert picture, select your GIF file, and click Insert. This should work on both Mac and Windows. On some devices, copying and pasting the GIF can also work (for others, it will add the GIF as an attachment, instead of embedding it into the email).
How long will the templates be in my account?
We added the templates to your account on December 7. You can use them until January 15, 2023.
Any feedback?
We’d love to hear about how you’re using your templates, and if you have any feedback for the next time we do something similar!
Feel free to tag us on social media (LinkedIn, Instagram, Facebook, Twitter), or share your creations as a response to our email or via your account manager, so we can take a look. 👀
We look forward to seeing your masterpieces!
More gifts from us: Social media tips and tricks
Read our latest blog posts to catch up on the top social media trends and content creation tips. Including:
- Discover the latest social media news, trends and best practices for December 2022.
- See how you can increase your website traffic from social media with these ideas.
- Be inspired by examples of Twitter carousels, events, and “we’re hiring” social media posts.
- Get tips on how to grow your employer brand, and check out examples from top (employer) brands.
